Upgrading D-Link DIR-615 Router to DD-WRT
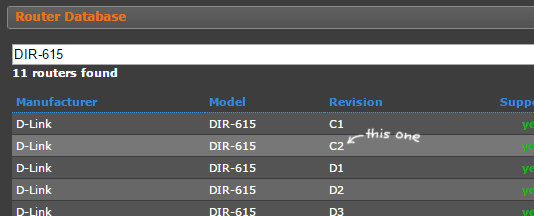
Searched on the DD-WRT database if there was an update for my router, fortunately there was (revision C2). The row doesn’t look like its an active link but just clicked …
Searched on the DD-WRT database if there was an update for my router, fortunately there was (revision C2). The row doesn’t look like its an active link but just clicked …
Sometimes, you get used to a Linux workflow and prefer doing things like finding files via ack. Here’s how I got it working on Windows 10 64bit. Head over to …
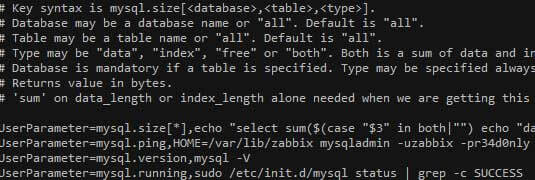
We’ve found that Zabbix has been reliable for our use case so far. This is a how to guide for installing a Zabbix agent on CentOS 6. This assumes you …
Find is a very handy tool in Linux when looking for specific files and folders with required conditions. The following are some examples of how you can use find to …
The XML-RPC support by WordPress looks good in practice but unfortunately it’s commonly used as a denial of service (DOS) attack by automatically posting data to the xmlrpc.php script and doing …
Finally decided to retire my now 5 year old laptop, the reliable ASUS F8SG. Hasn’t failed me yet, stock hard disk still works after all these years though I upgraded …
I just found out that out of the box, the DKIM configuration for cPanel/WHM didn’t pass. Here’s what I did to fix it. The Fix First off, make sure that …
Here’s how to export an SSL certificate from Google’s Chrome browser. This is specifically for exporting the StartSSL certificate for backup purposes. Go to Settings > HTTPS/SSL > Manage certificates… …
This is a guide to install WHM/cPanel on CentOS 6.6 64bit. This setup is specific to this configuration, where we use CloudFlare as name servers. Prep the OS Start by …
Emmet is an awesome notepad++ plugin and really makes coding in html really efficient. Getting this plugin to run though can be be a pain. This applies to notepad++ version …